
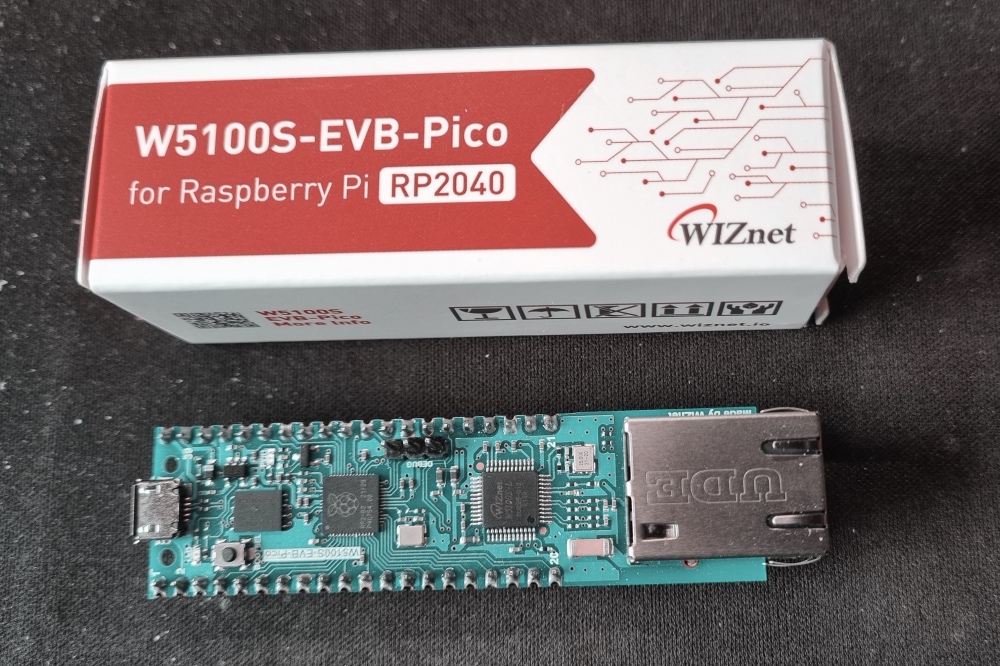
Using WizNet W5100S-EVB-Pico RP2040 for a IoT Fan Controller
WizNet were kind enough to provide me with a trial W5100S-EVB-Pico board. This has the same processor, RP2040, as Raspberry PI Pico, and the same pinout. It adds an Ethernet RJ45 port and Ethernet controller, W5100S connected to the RP2040 SPI pins (Pins 21 through 27). I decided to test it out and build an IoT Fan Controller.
The Fan Controller is an IoT managed cooling fan system for my home server cabinet. This gets warm as the PoE (Power Over Ethernet) switch generates a lot of heat. Under the shelf housing my server rack is the washing machine, which also gets warm. This is therefore an ideal solution for a microcontroller with ethernet onboard, as I have ethernet from the switch right next door. So a good project to test out the W5100-EVB-Pico.
Fan controllers can be managed locally with RGB Led status on the PCB, OLED screen and Rotary Encoder in front of the fans to allow setting of preset temperature and speed. The state of the device is also broadcast on change via an MQTT hub to any authorised listeners. By design this includes a digital twin service which maintains a copy of the device’s state. The digital twin is the only persistent copy of the device’s state. On device start up the state is reloaded from the digital twin (data not firmware).
W5100S-EVB-Pico
The W5100S-EVB-Pico was easy to use just like a Raspberry PI Pico. I was able to compile standard Pico code and flash the device through the SWD port. The SWD port is in a different location to the Pico as the end of the device has the RJ45 connector.

WizNet provides an additional library to work with the W5100S, IoLibrary_Driver. The library is quite low level though it does provide some high level application services including NTP, MQTT, HTTP, FTP, etc. There are also examples using FreeRTOS, though these are a little simplistic. Generally documentation is not to the same quality provided by Raspberry PI Foundation. So expect to do significant experimentation and debugging.
I did find one or two issues on this board. The board has no MAC address, and so I was going to try to create a MAC address with the last two bytes based on the device’s serial number. Unfortunately the pico_unique_id sdk appears to return zeros. Also the onboard thermometer sensor seems to be being heated by the board as was reporting over 30oC instead of room temperature. Temperature was key to this project so I added a DS18B20 to the project and built a RP2040 library to manage these.
I also found a few abnormalities with NTP (Network Time Protocol) and DNS (Domain Name System) resolution. NTP randomly fails, I build retires into my usage and a list of 5 servers but still get a small number of failures. DNS resolution works very well apart from to the address “mqtt.home” that I use as an alias for my MQTT hub. This would not resolve from the device, yet “mqtt.home.com” resolves perfectly.
Project Requirements Met
The project requirements where:
- Control speed of two PWM 12V fans
- Set speed based on temperature read from DS18B20
- Hold three preset temperatures and associate speeds
- Allow an override of fan speed for a set period. 10 minutes to 10 days
- Operate RTC synced to NTP for GMT
- Operate a maximum speed for night time operation to reduce fan noise
- Allow local modification of presets, maximum night speed, and fan speed override
- Update a digital twin with state changes based using MQTT
- Support get and set operations using digital twin protocol over MQTT
- Connect to MQTT Hub, EMQX
Hardware
Electronics:
- W5100-EVB-Pico
- OLED SSD1306 128×64 display
- Common Cathode RGB LED
- 3 x Resistor 92 Ohms: for LED
- Rotary Encoder
- 2x 10nF Capacitors: to tame noisy Rotary Encoder
- DS18B20 – Temperature sensor
- Resistor 4.7K Ohms for DS18B20
- 12V 90mm PCM Controlled fans
- Buck Converter – to step down 12V to 5V for the Pico Board
- 12V power supply
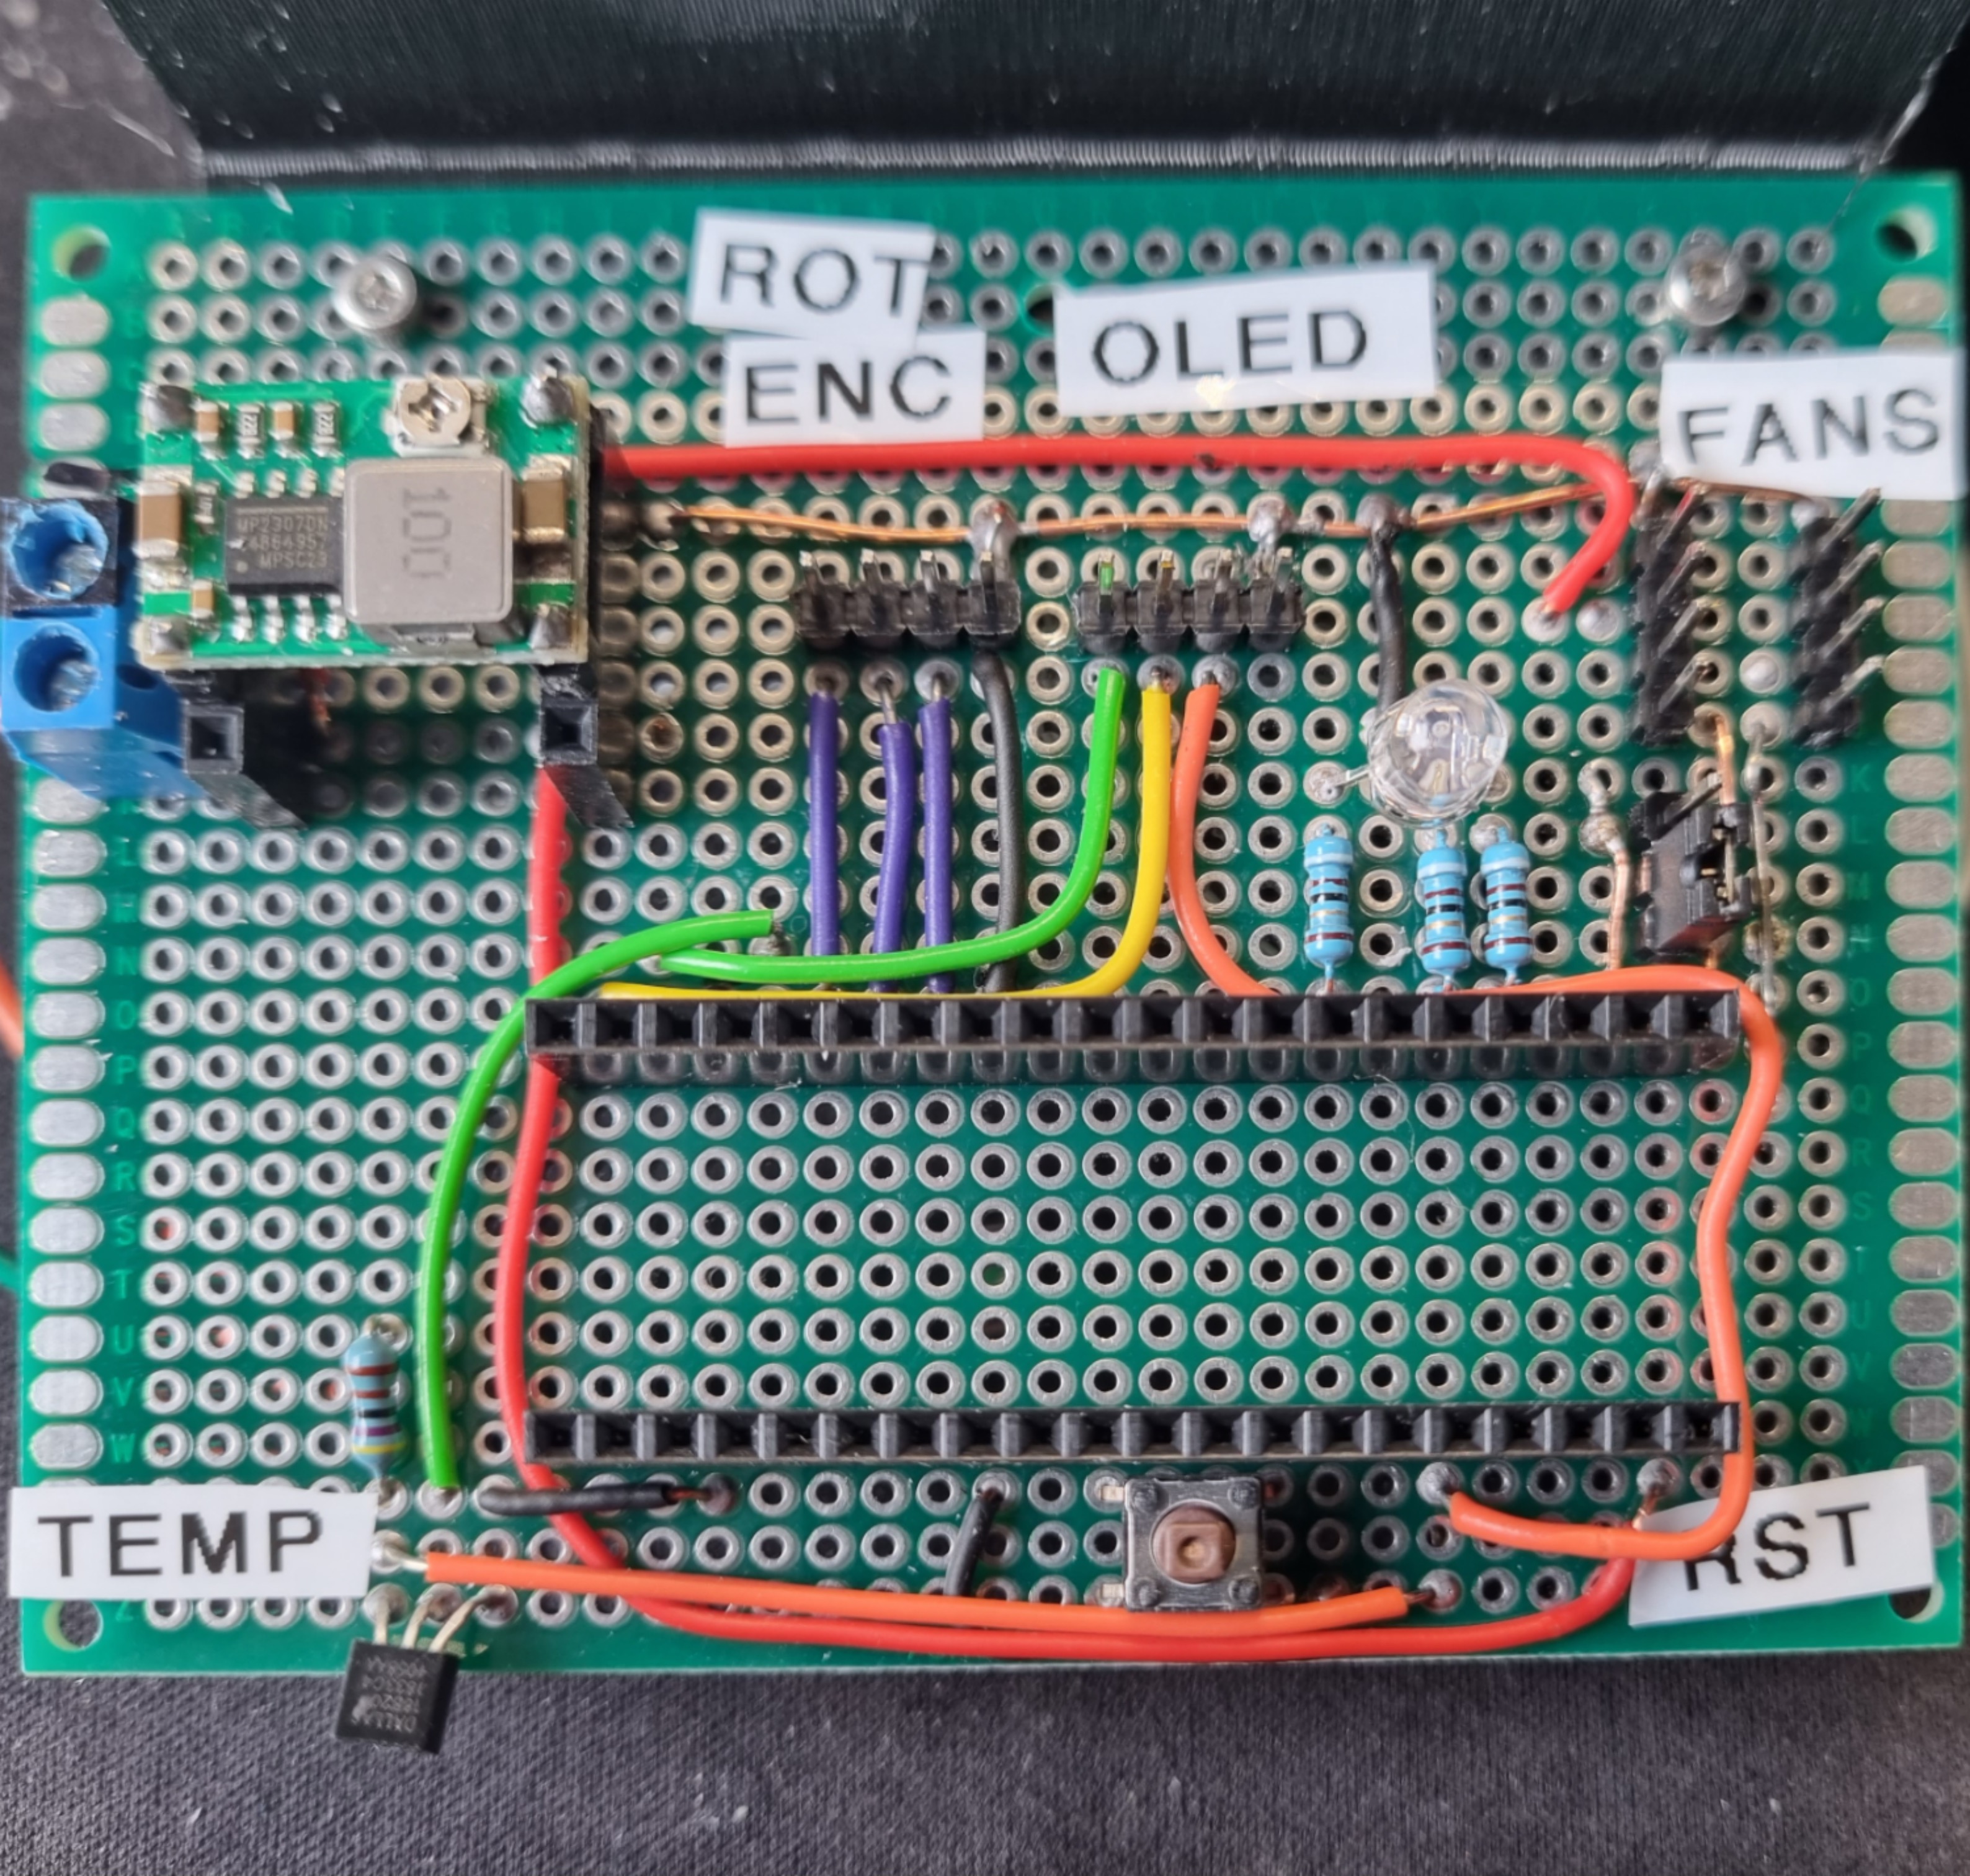
Schematic is very simple and included in the repository in KiCad format. No PCB design is present as this was built as a one off on a prototype board.
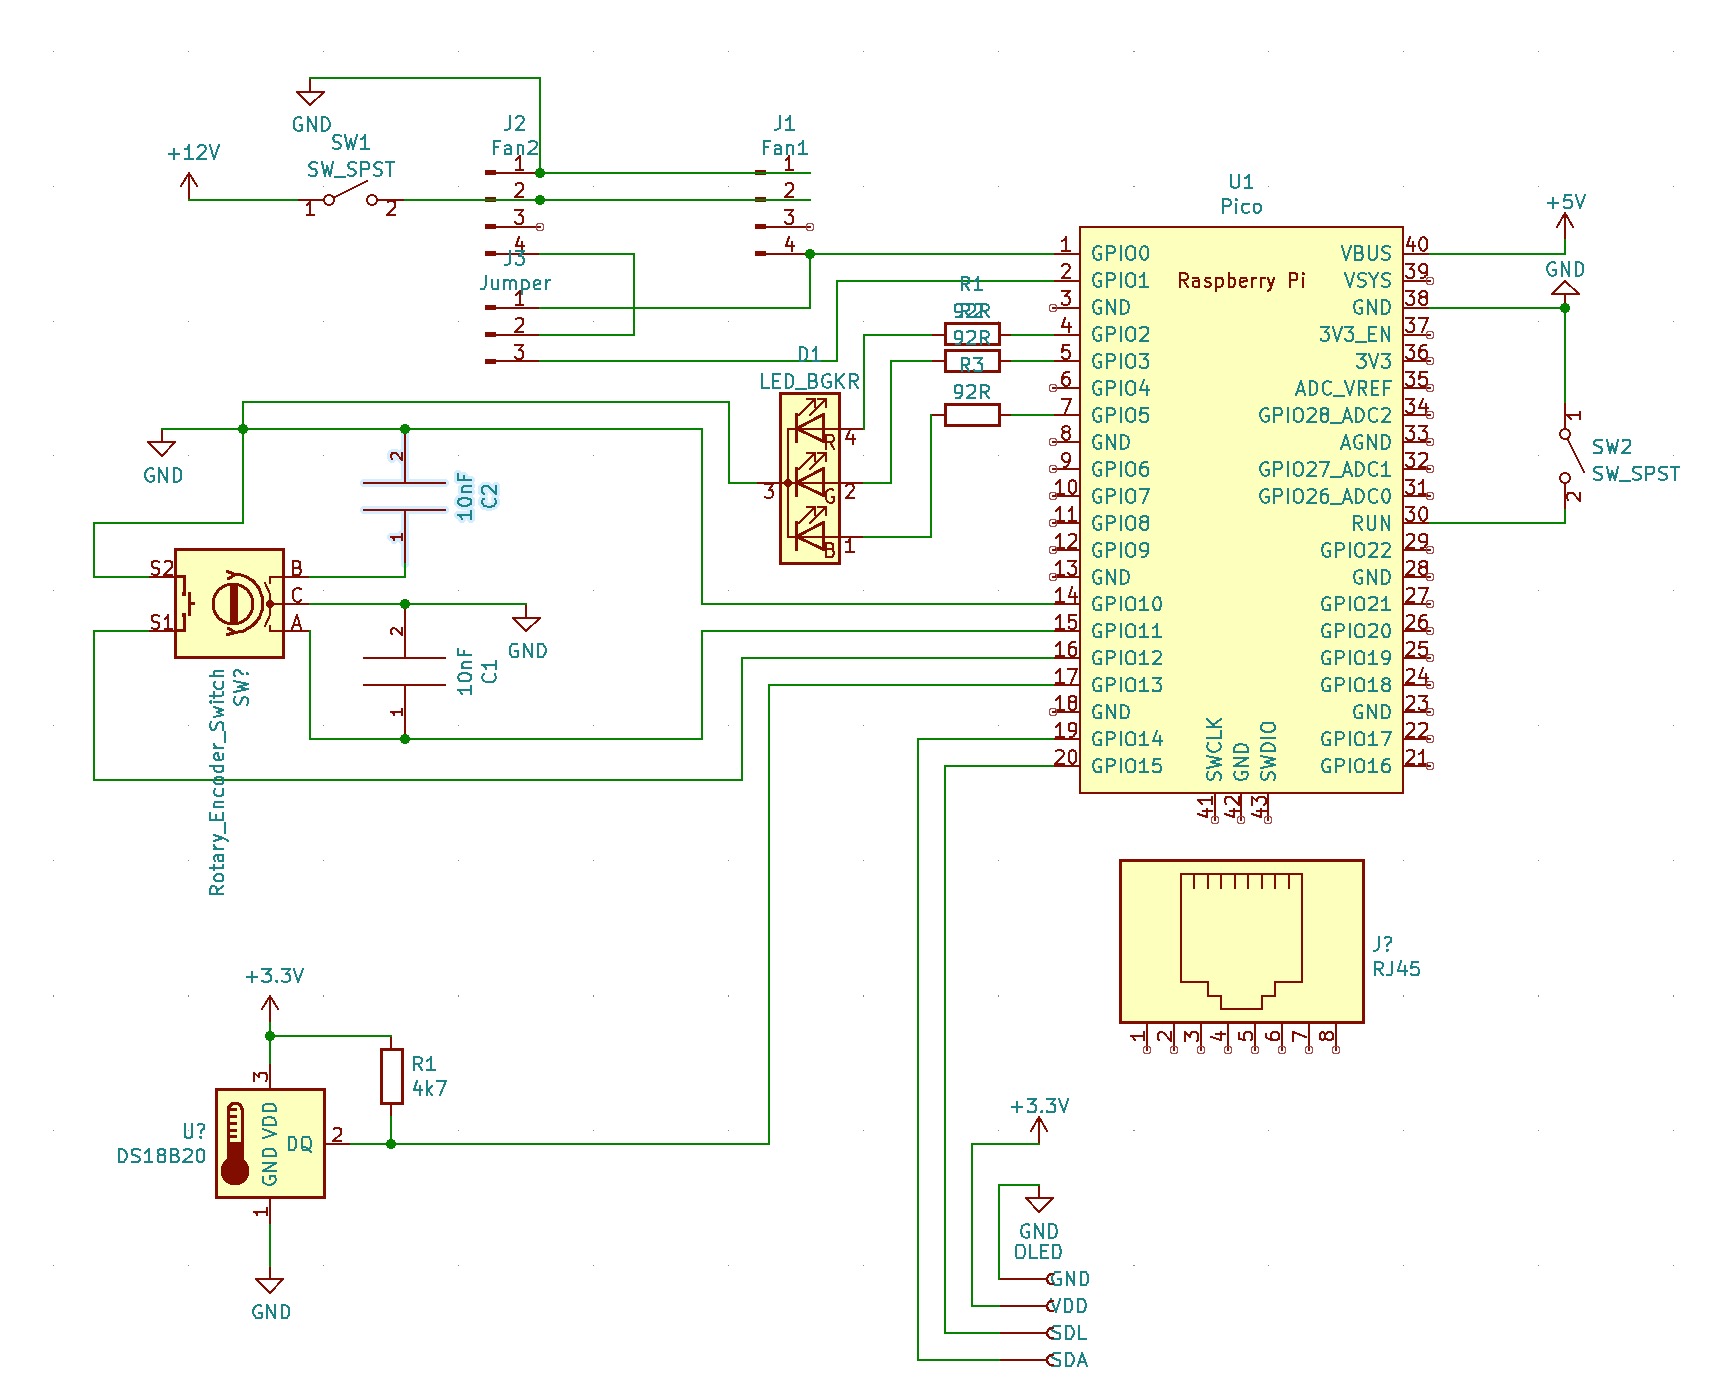
I used a 12V 5A power supply, as had one on the shelf. Though this is pulling less than 1A of current. A buck converter to step down 12V to 5V and apply on Pin 40 as power into the W5100S-EVB-Pico. I also added a reset button to support the times that NTP fails.
The Fans are controlled through GPIO0 as PWM. Taking 12V directly from the power supply.
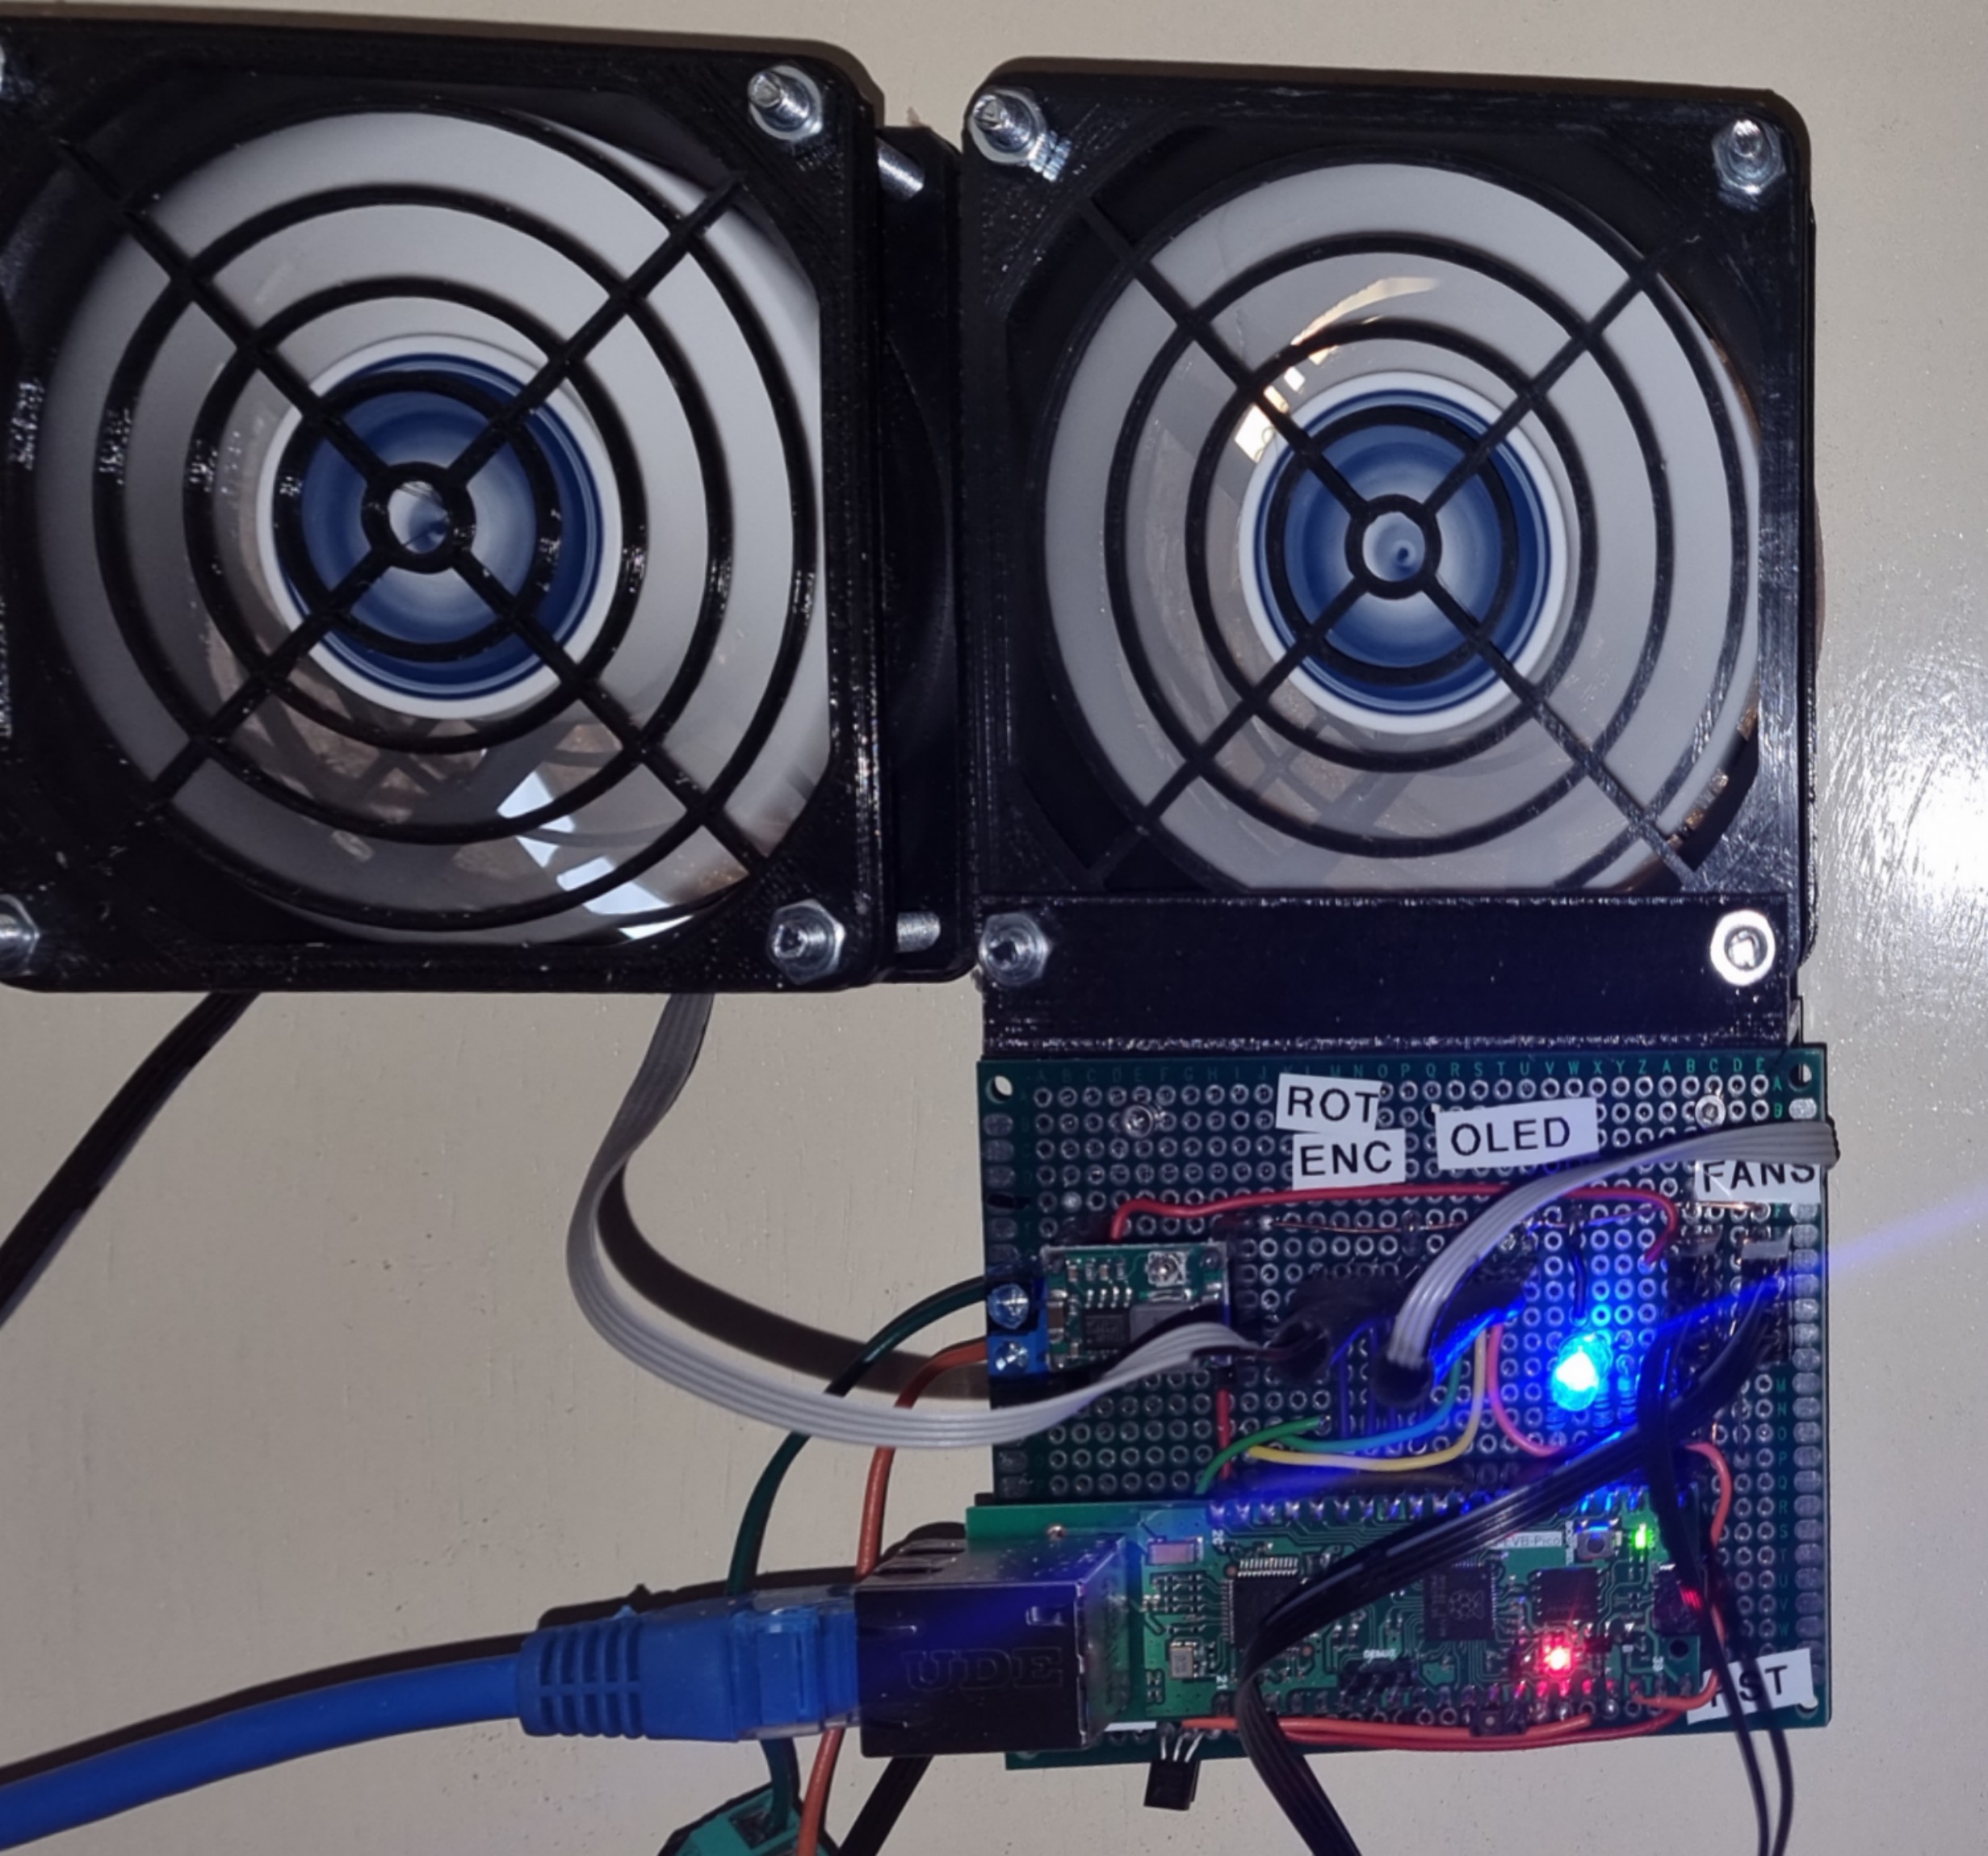
I use an RGB LED on a lot of project boards to give me more detailed status than I can get from the onboard LED. So I can see at a glance the LED is blue and so we have a connection to the MQTT Hub. Red would show me that I have no IP address and Ethernet is down. The on board LED is also used to give me a simple slow blink to assure me the device has not died. This blink is done through a task also managing the RP2040 watchdog function.
Temperature is read through the DS18B20 attached to GPIO13. This is directly on the PCB as I did not intend building a case for the board. It is on the edge to keep it away form any local heating and get as close to an environment tempered as possible.
The local user interface is an OLED speed with I2C connection on GPIO14 and GPIO15. User input is then managed through a very electronically noisy Rotary Encoder. I used a couple of capacitors to reduce some of the noise without degrading the signal.
Casing:
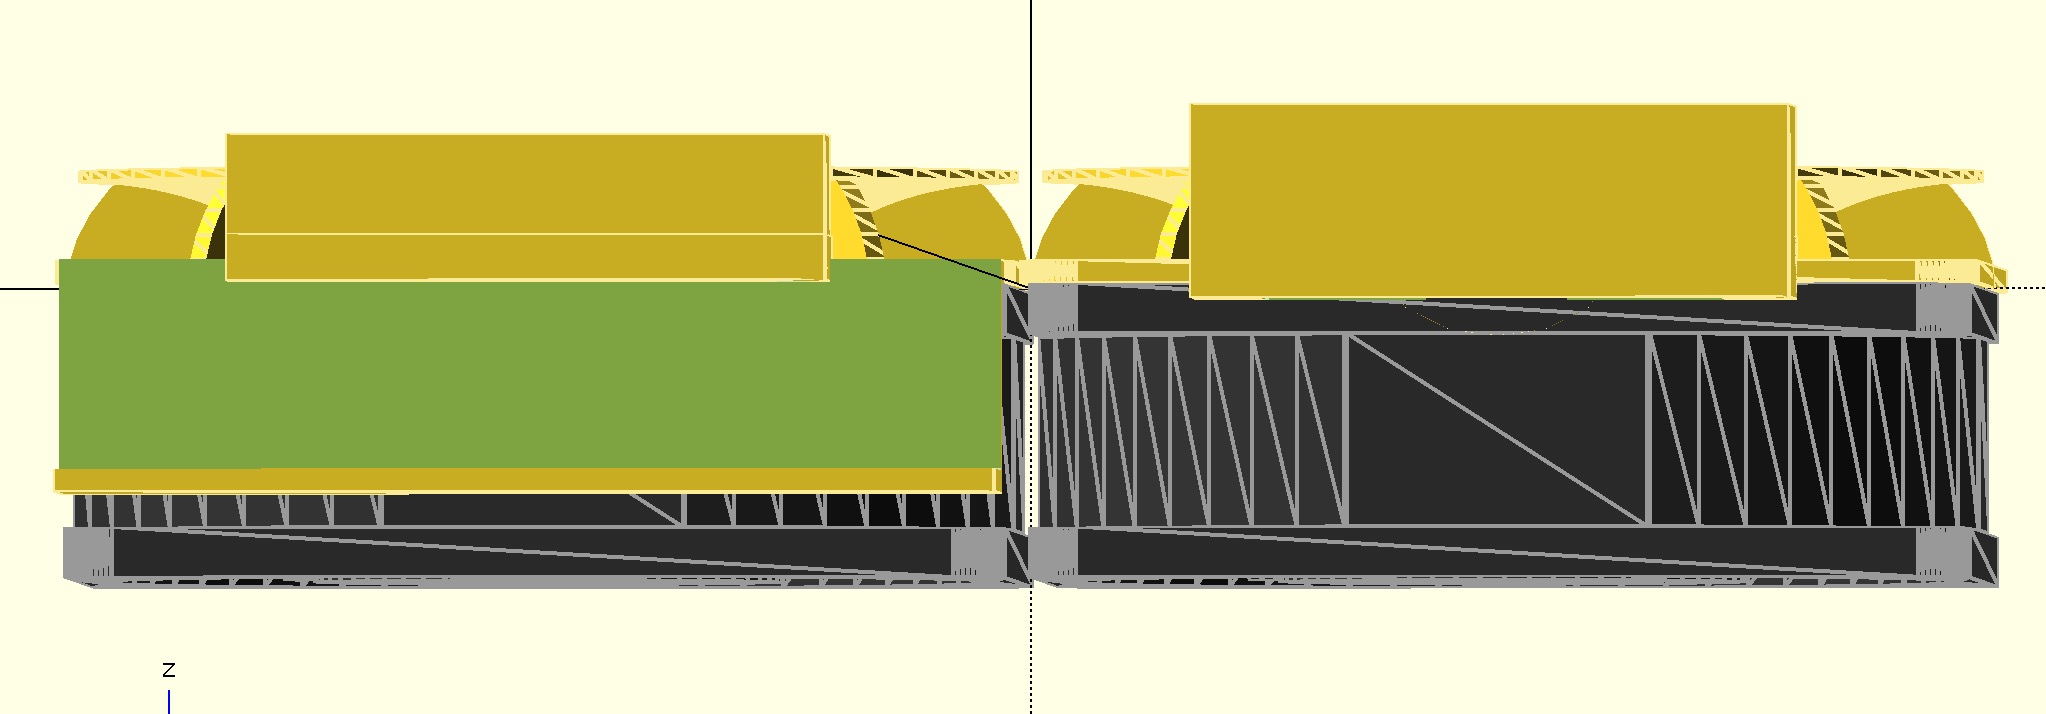
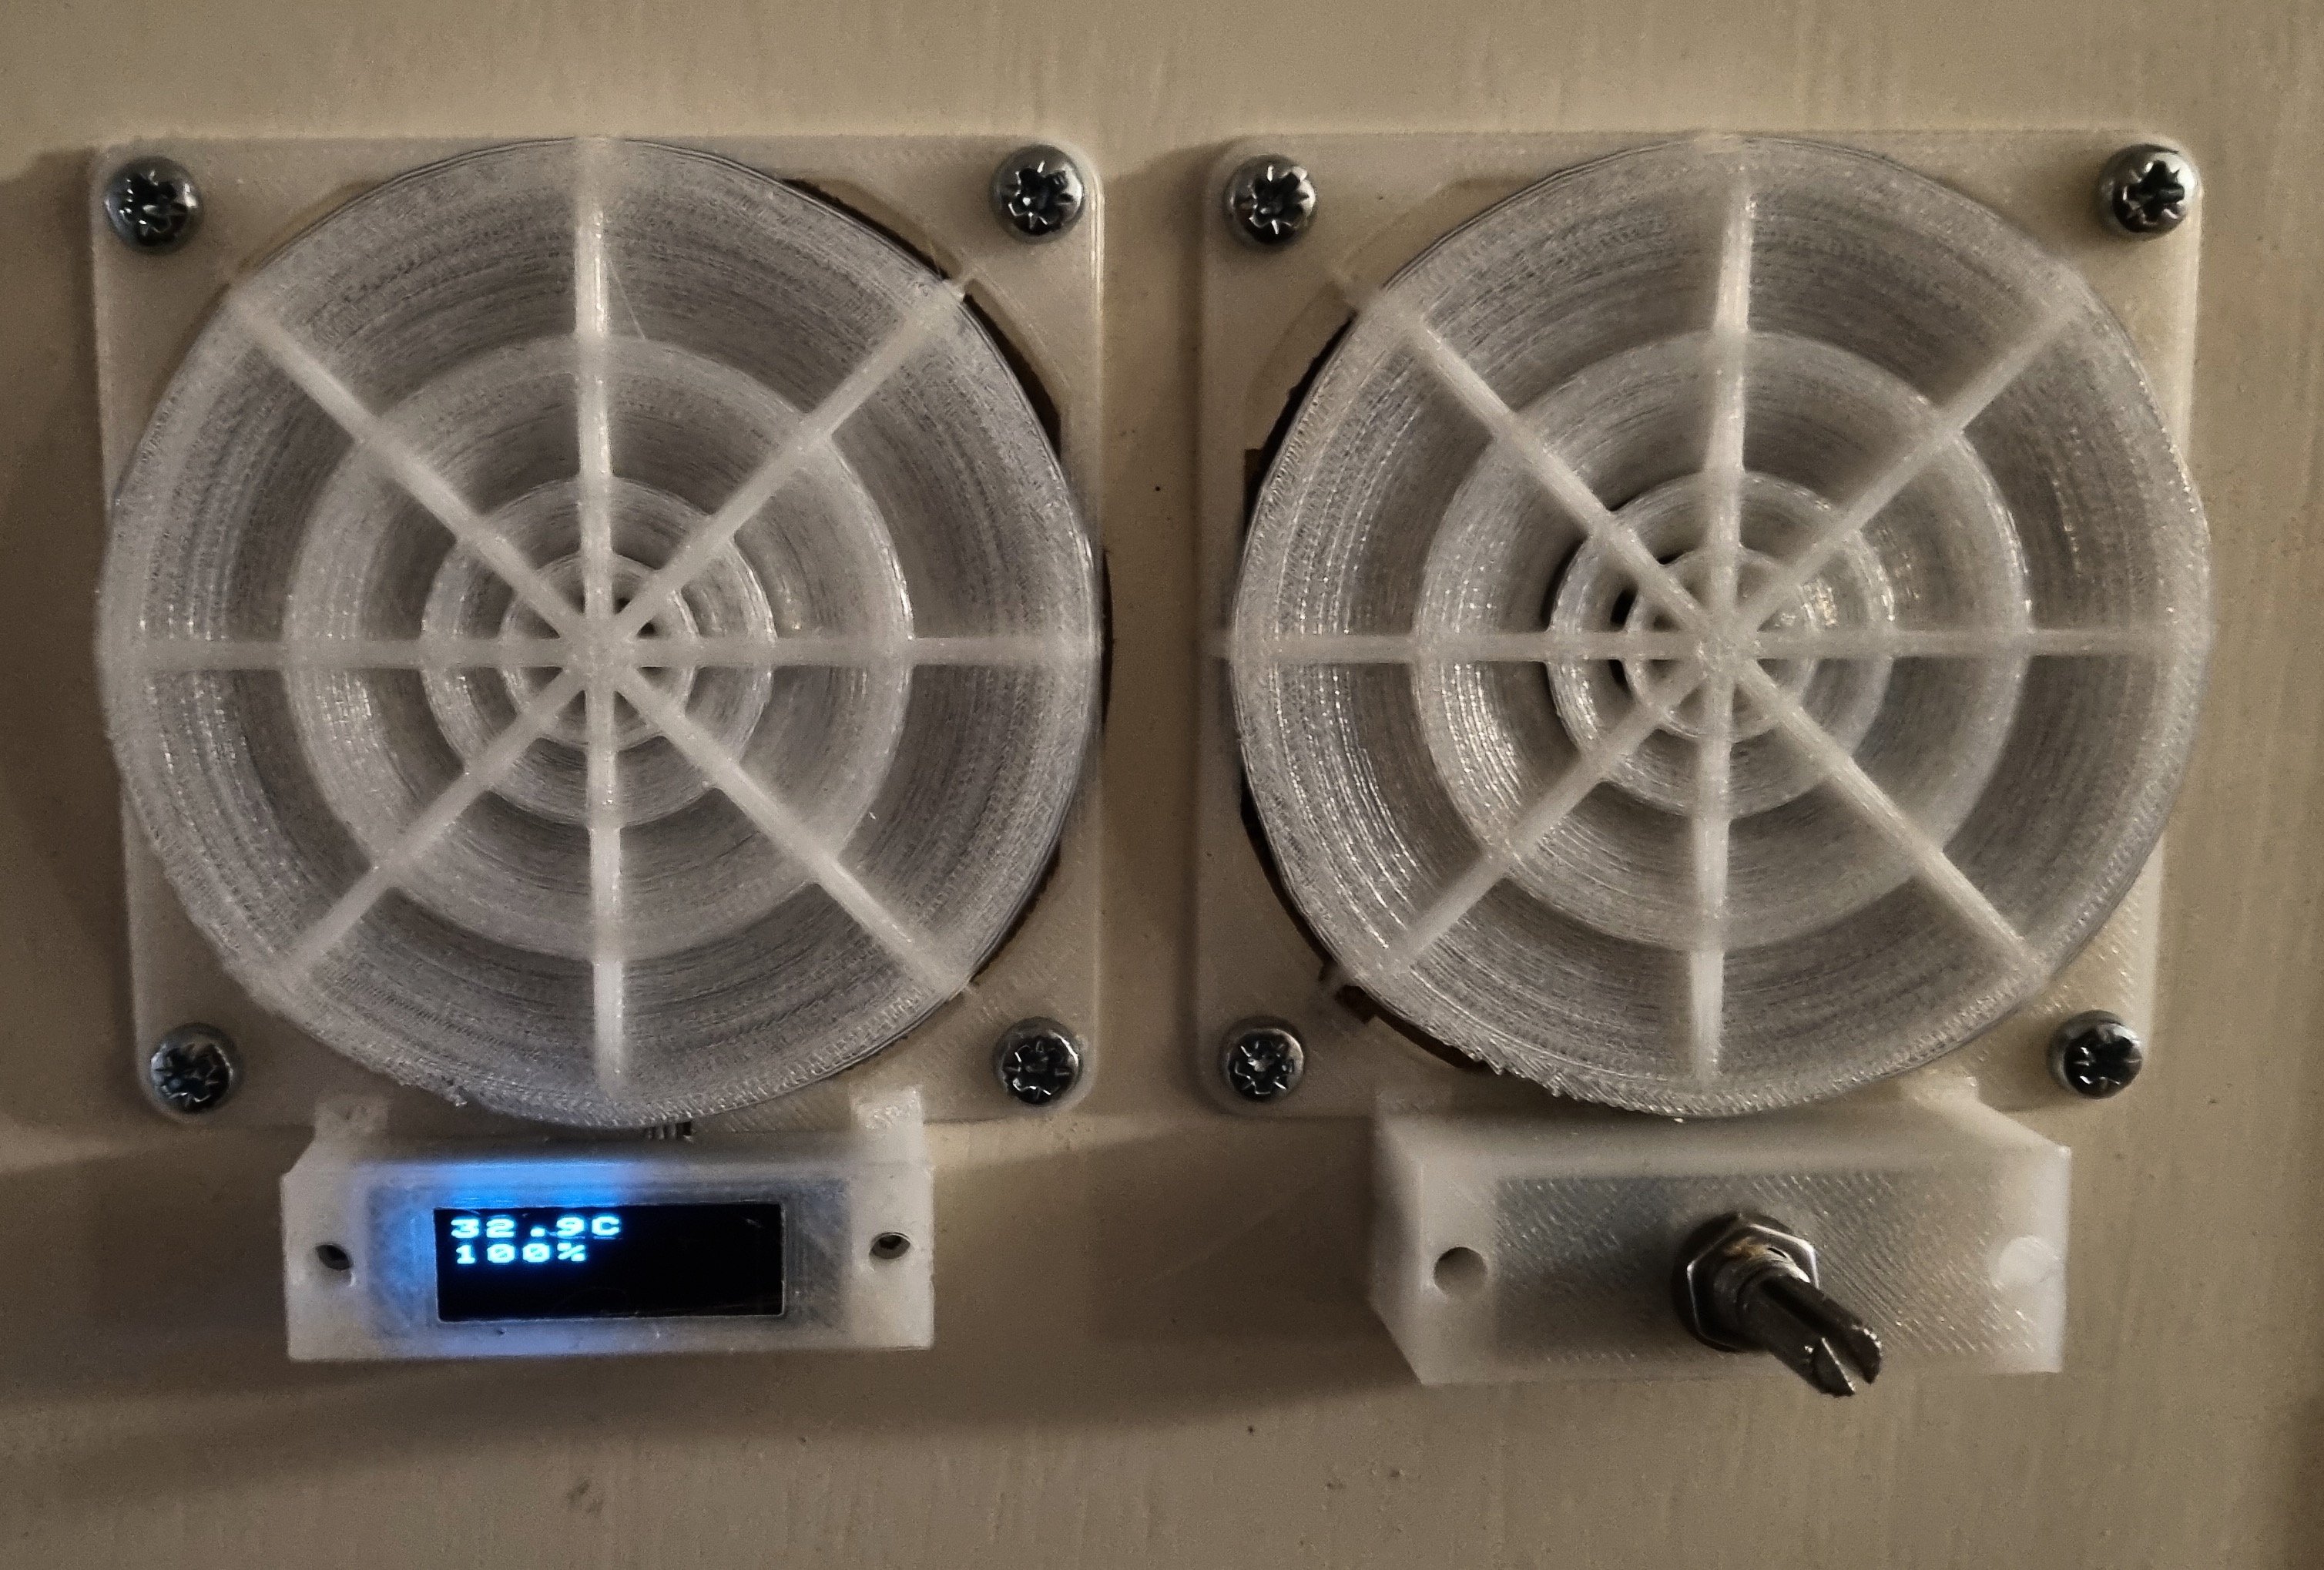
3d Models were used to print guards for the fans with housing for OLED screen and Rotary Encoder. Also guard on the back of the fans and bracket for holding the PCB. This allowed the whole unit to bolt to the door using 8 M4 80mm bolts (4 per fan).
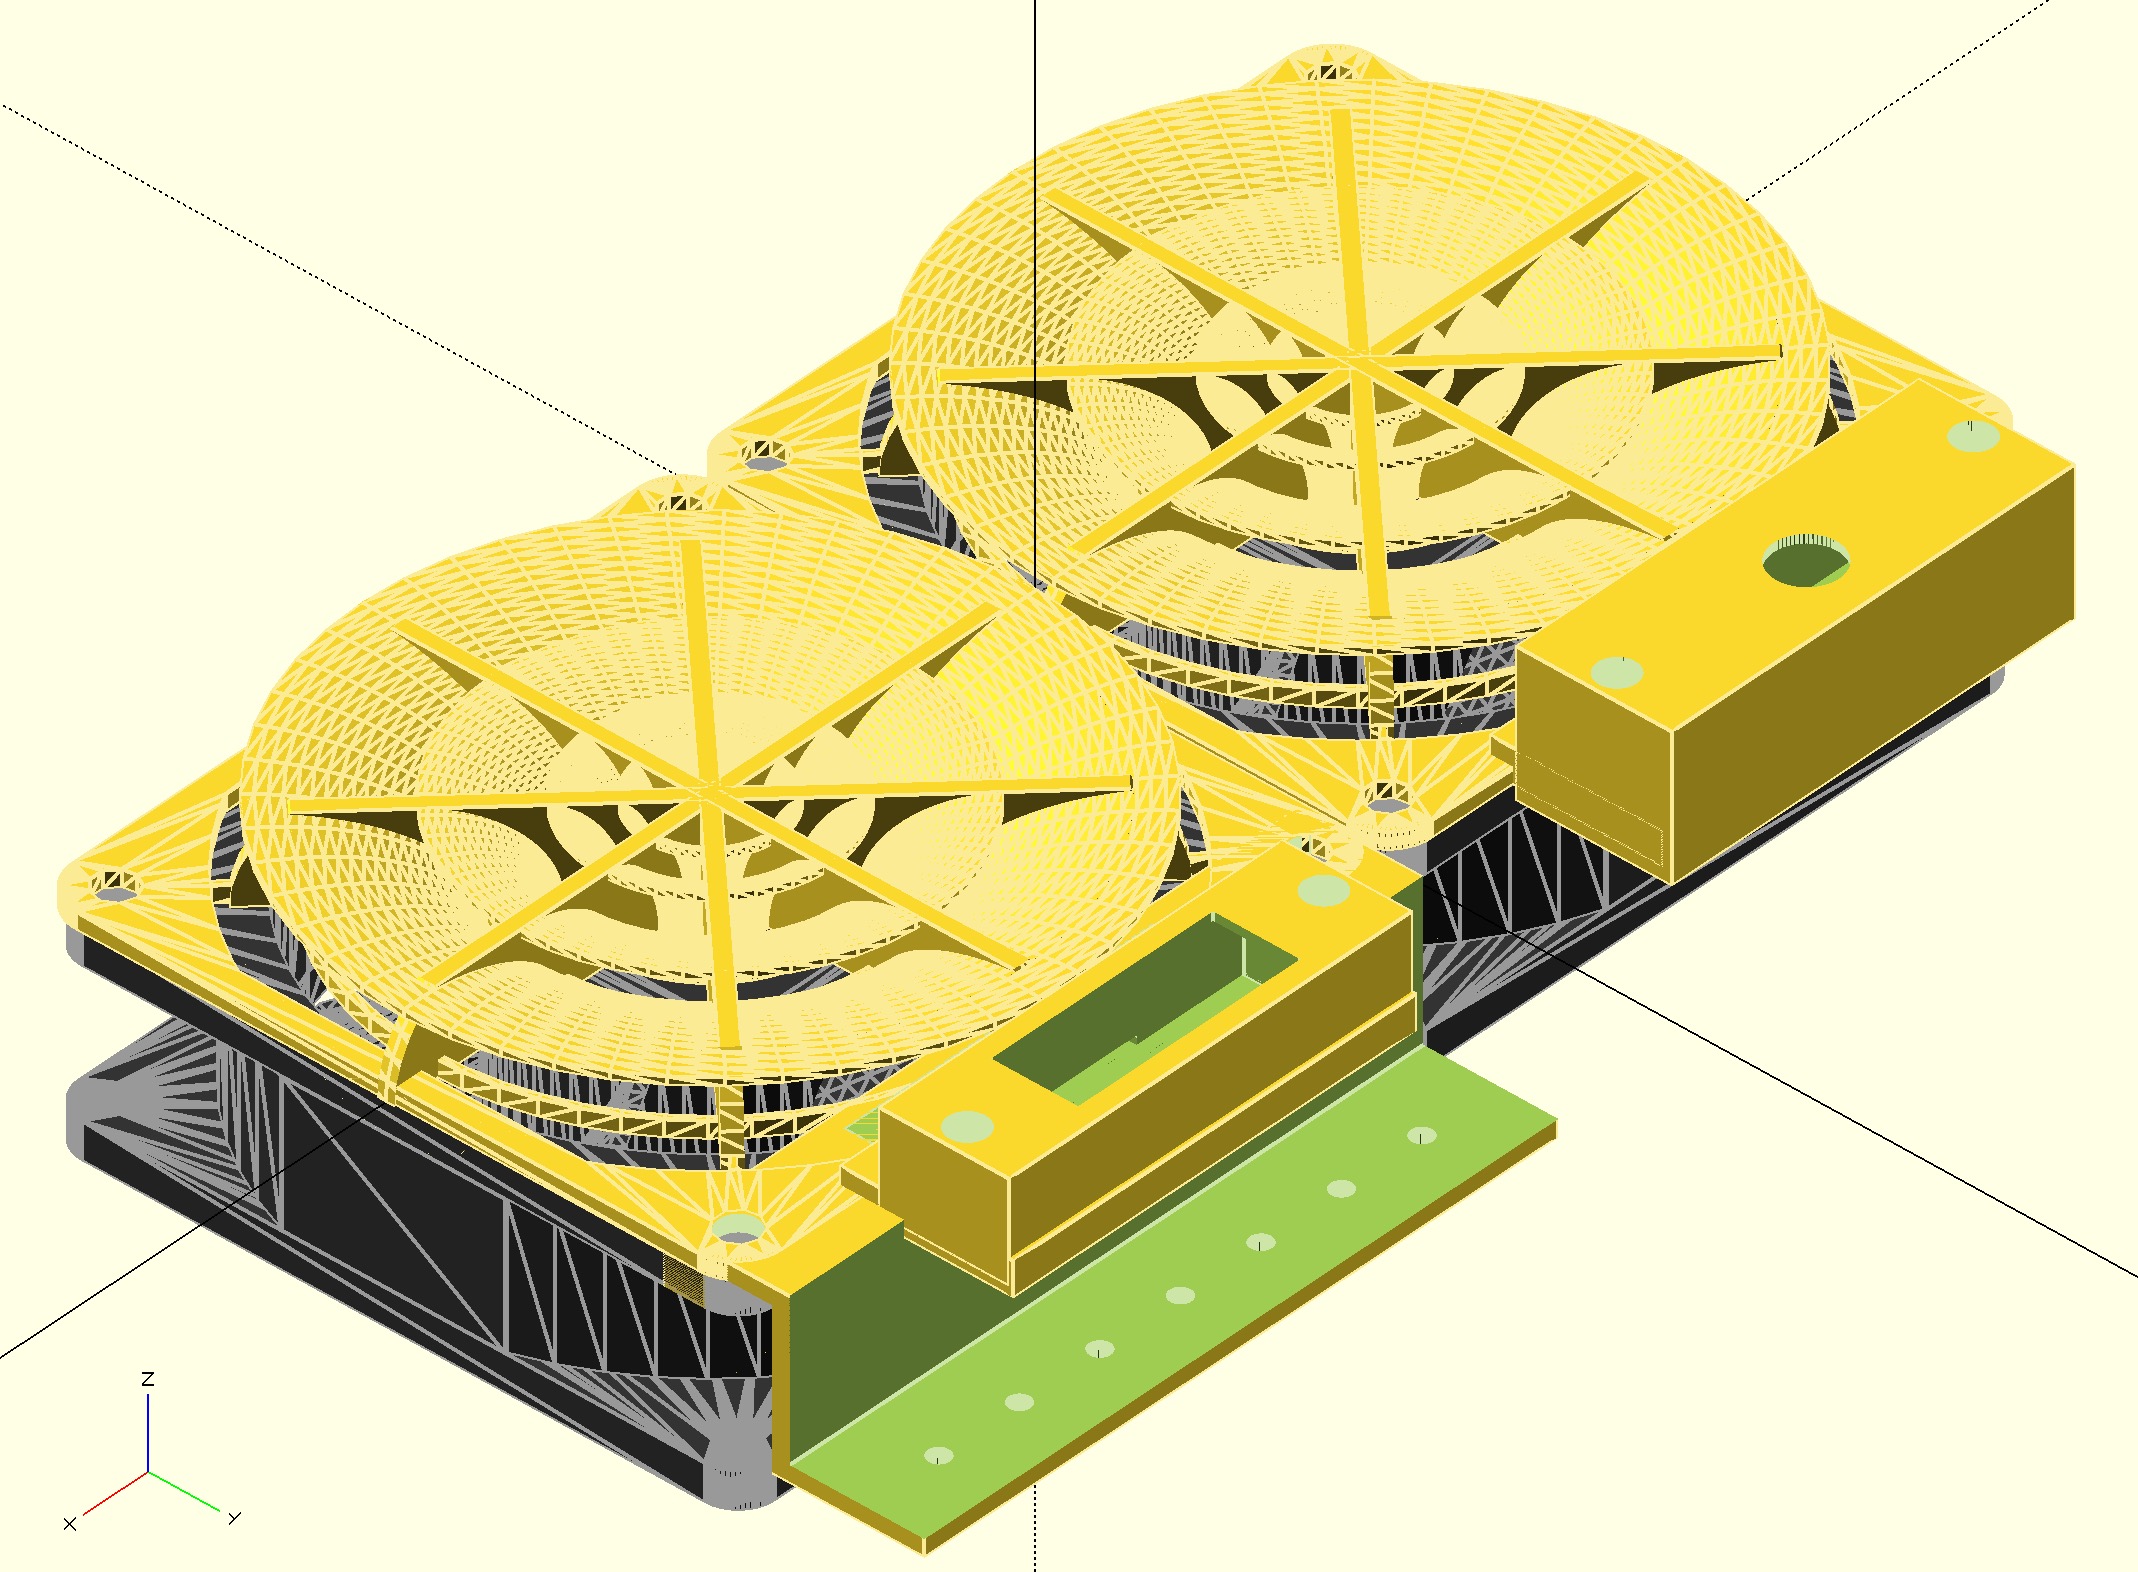

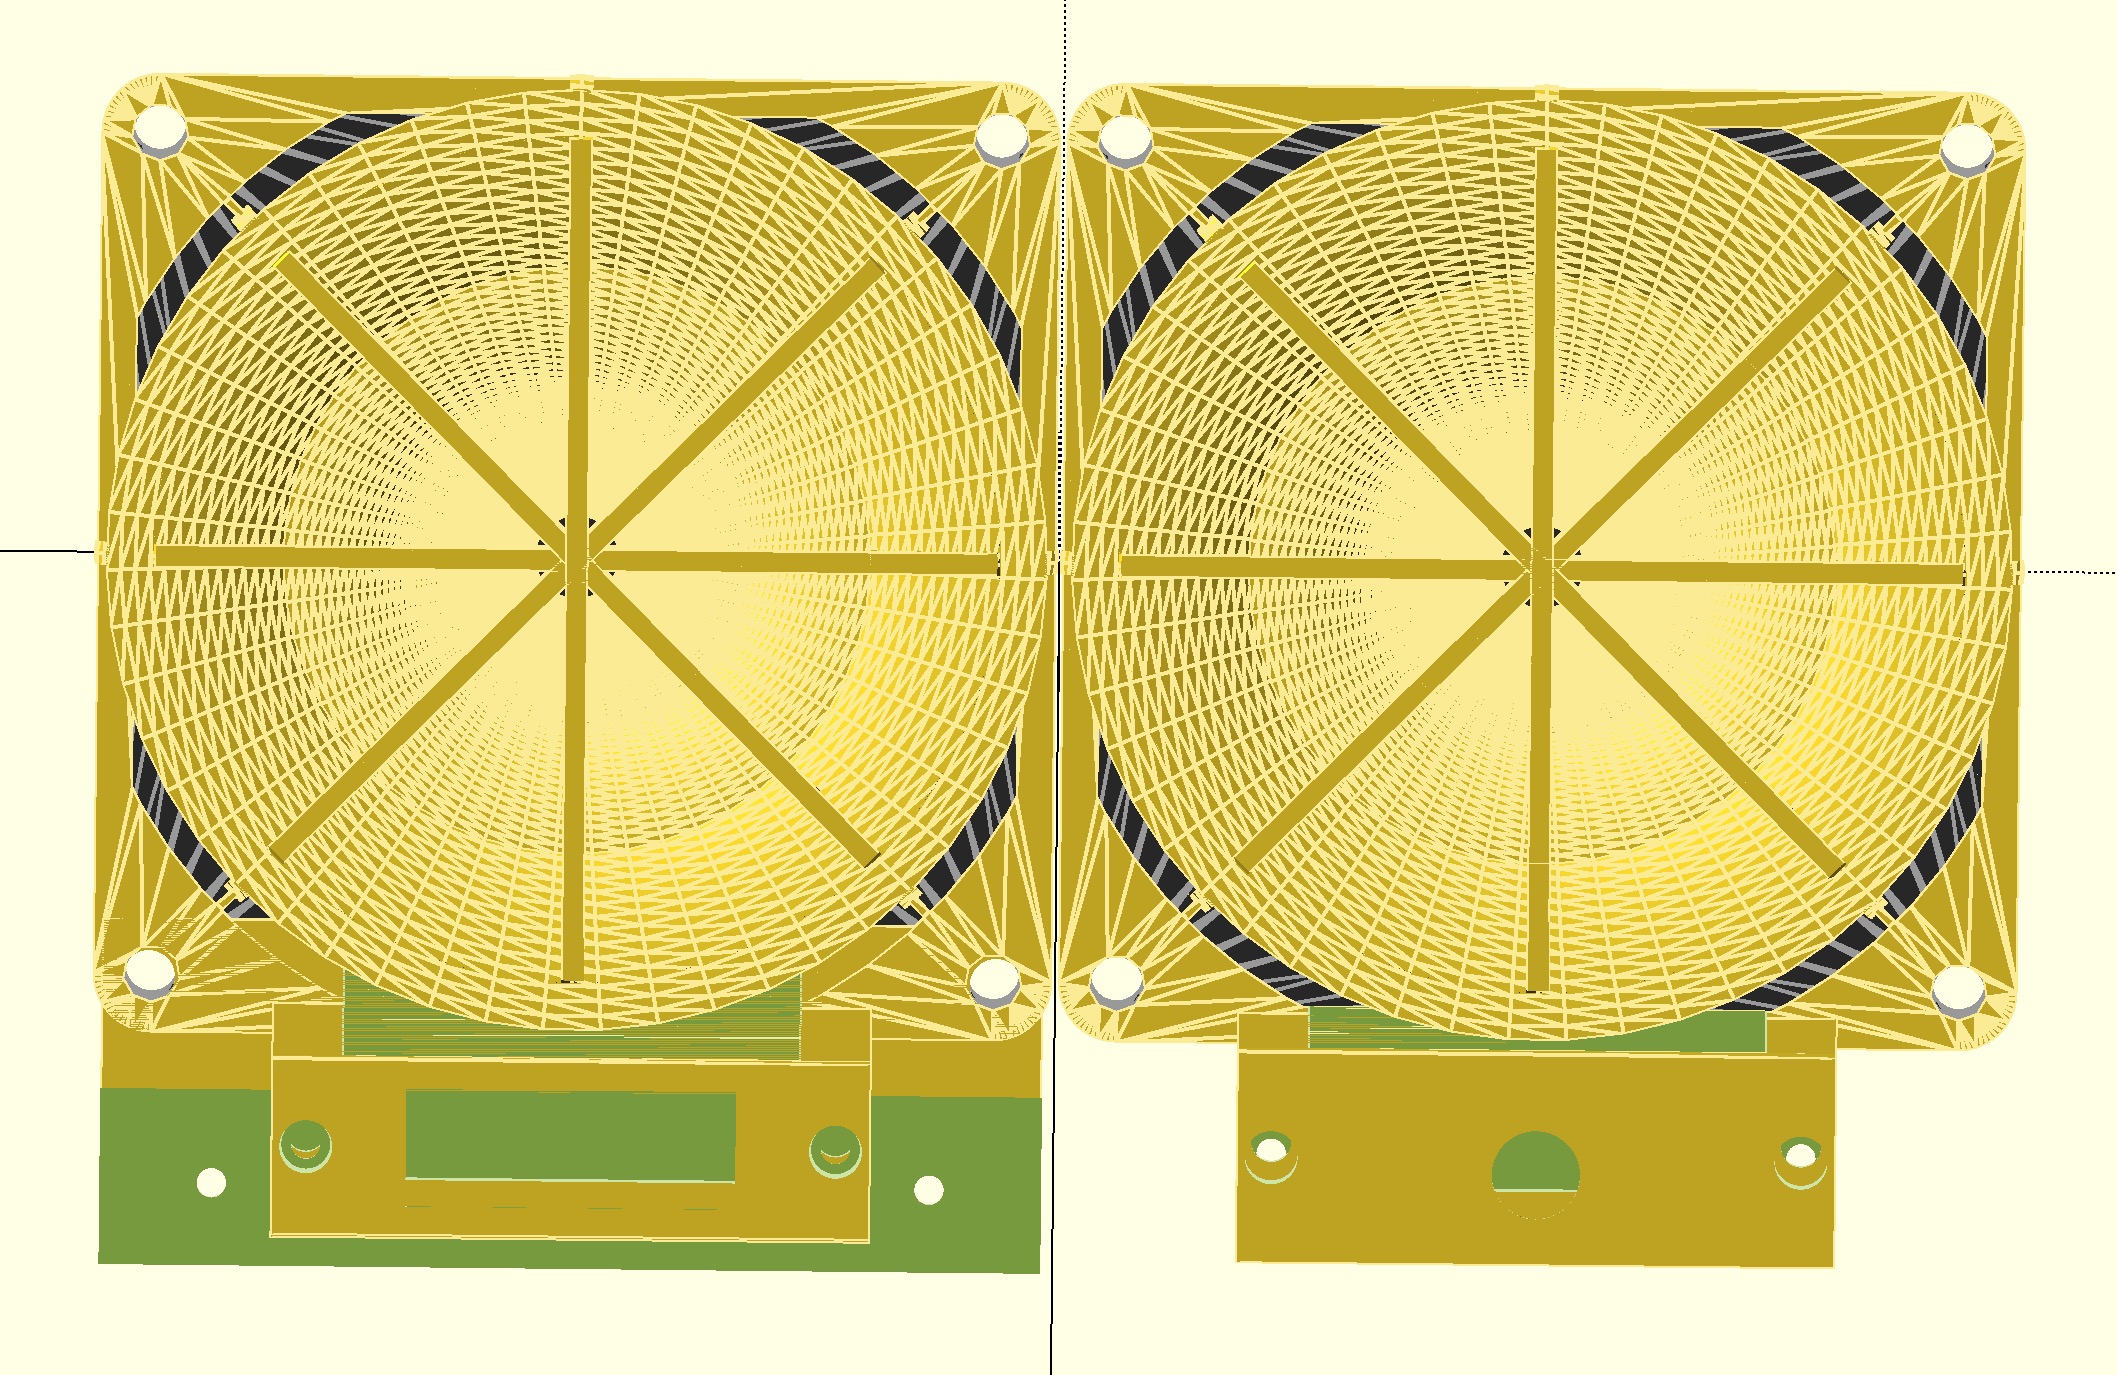
I use openscad for modelling and printed on a Dremel 3D45. I used m2 inserts pushed in with a soldering iron into the fan cover to allow me to screw the OLED and RotEnc housing into place.
Fan Controller Software
Fan controller operates on a single core of the RP2040. Built from WizNet’s ioLibrary Driver and examples. FreeRTOS is used to provide concurrent task management and implement MQTT protocol. This allows me to upgrade to MQTT over TLS for security purposes.
I adapted my RP2040 IOT Twin framework (https://github.com/jondurrant/twinThingPicoESP) to support the W5100-EVB-Pico board. This provides a framework to define a state object which will hold all of the attributes of the device (temperature, preset, current speed, etc). It managed updates to and from the MQTT Hub along with notification of changes that we can link into are hardware control. This library (https://github.com/jondurrant/twinThingRP2040W5x00) is reusable for other IoT projects using the WizNet board, and simpler to use that the ESP-01S approach I have used on my Saber Light project to provide WIFI (https://github.com/jondurrant/LSaber1).
A fan control task operatea from the state attributes to change PWM settings on GPIO1 and drive the PWM fans.
Local interface management was another separate task managing the oled display, and taking input from the rotary encoder. To allow a sampling strategy for the rotary encoder, this also needs to be a separate task sampling at 2 ms intervals.
A number of libraries are used by the project and my thanks to the authors for making my easy:
- FreeRTOS-Kernel: Task management
- FreeRTOS-CoreMQTT-Agent: MQTT Library
- ioLibrary_Driver: Drivers for W5100s
- twinThingRP2040W5x00 – IOT Library for my devices
- json-maker: JSON writing for comms
- tiny-json: JSON parser
- RP2040PIO-DS18B20: Sensor library
- pico-ssd1306: Oled Driver
- RtosComponents: Watchdog module
The DS18B20 was added in after having issues with the onboard temperature sensor. Unlike a Raspberry PI Pico the W5100S-EVB-Pico sensor seems to be being warmed from the circuit board itself. The DS18B20 allowed a true environment temperature to be read.
System Software
I use EMQX as my MQTT hub with MySQL server authentication. The Fan Controller connects to this and authenticates.
Also connected to the MQTT hub is Twin Manager, a python service which listens to device connections and manages a twin copy of the state of the devices. This state is also stored in MySQL. The Twin Manager operates across multiple devices and provides some more complex services. For the Fan Controller functionality though it is simply state preservation.
Summary
Installed onto my server cupboard door the fan controller looks good and the user interface is surprisingly easy to use. The PCB and W5100S-EVB-Pico is left exposed at the back but inside the cupboard and out of the way.
All of the code and 3D models can be found in the GitHub Repo.
If you are new to developing in C or C++ for the Raspberry PI Pico or RP2040, then check out my course Introduction to C Development Environment for Raspberry PICO on Udemy.
If you are interested in IoT, Raspberry PI, IT Strategy and IT Architecture please do follow me on social media.

One thought on “IoT Fan Controller”